How To Send PDF For Signature: Our Step-By-Step Guide
10 mins
Struggling with how to get your PDF documents signed quickly and securely? Sending PDFs for signatures can feel complicated, especially when you want to ensure everything is legally binding and secure. Without the right tools, you risk delays, errors, and even potential legal issues.
In this SignWell article, we’ll walk you through the exact steps to send a PDF for signature and share best practices to ensure a smooth, secure process.
But first…
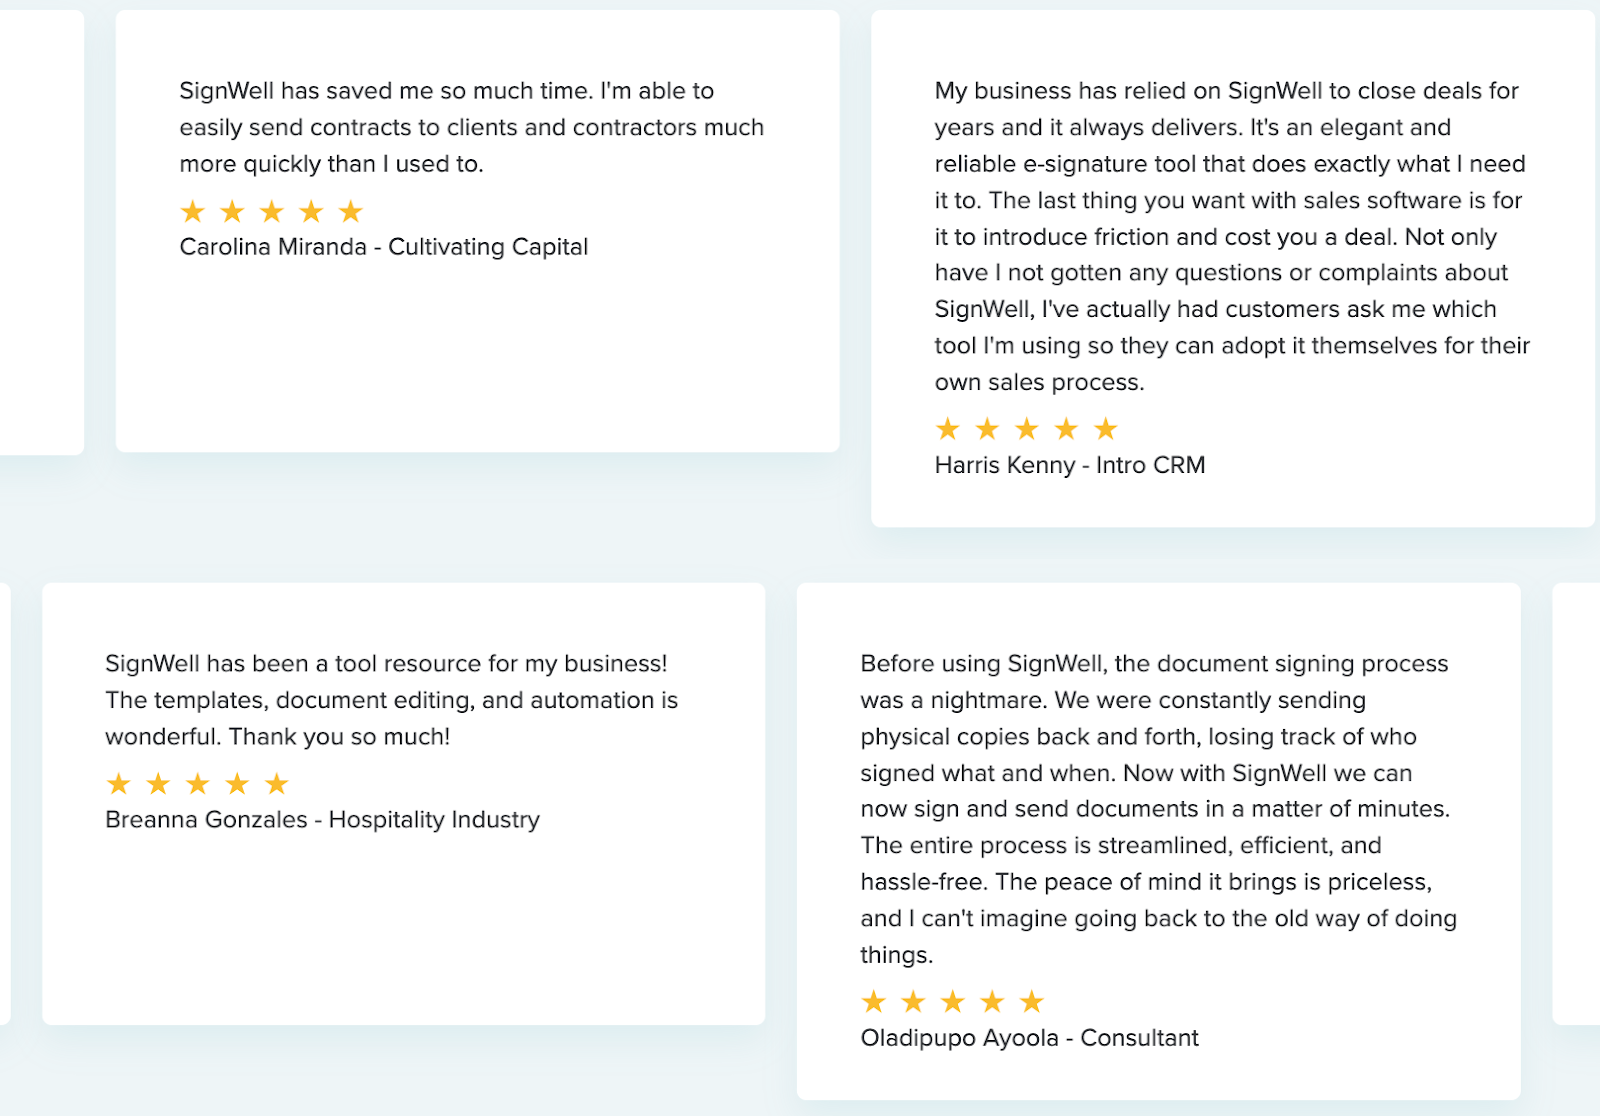
At SignWell, we’ve helped over 61,000 businesses securely send and manage PDF signatures, handling more than 4 million signed documents. We prioritize the security of your PDFs by adhering to international eSignature laws and using advanced encryption to protect their integrity.
With SignWell, your PDFs remain secure and unaltered throughout the signing process, ensuring that your business stays compliant and your documents are legally binding.
There are many instances where sending a PDF for an e-signature is both practical and essential. Here are some common scenarios:
Whether you’re finalizing a business agreement or closing a deal, contracts are typically sent as PDFs to maintain formatting and ensure all parties sign the same document. PDFs make it easy to track, archive, and ensure legal compliance.
When hiring a new employee, employers often send job offer letters, non-disclosure agreements (NDAs), and other paperwork as PDFs. This guarantees that important terms and agreements are securely signed and stored.
If you’re working with clients on projects, service agreements or scope of work documents may require a signature before starting. Sending these documents in PDF format ensures that both you and your clients are on the same page.
Legal documents such as affidavits, waivers, and consent forms often require signatures. PDFs are used because they are harder to alter, preserving the document’s integrity.
Financial institutions often require signed authorizations for transactions, loan applications, or investment agreements. PDFs provide a secure, unchangeable format that helps maintain legal and regulatory compliance.
At SignWell, we prioritize document security and offer a user-friendly eSignature tool that adheres to international eSignature laws. To get started:
a. Visit the SignWell website.
b. You can either:
After signing up and logging into your account, you’ll see your documents dashboard.
a. Click the “New Document” button.
b. Choose to either:
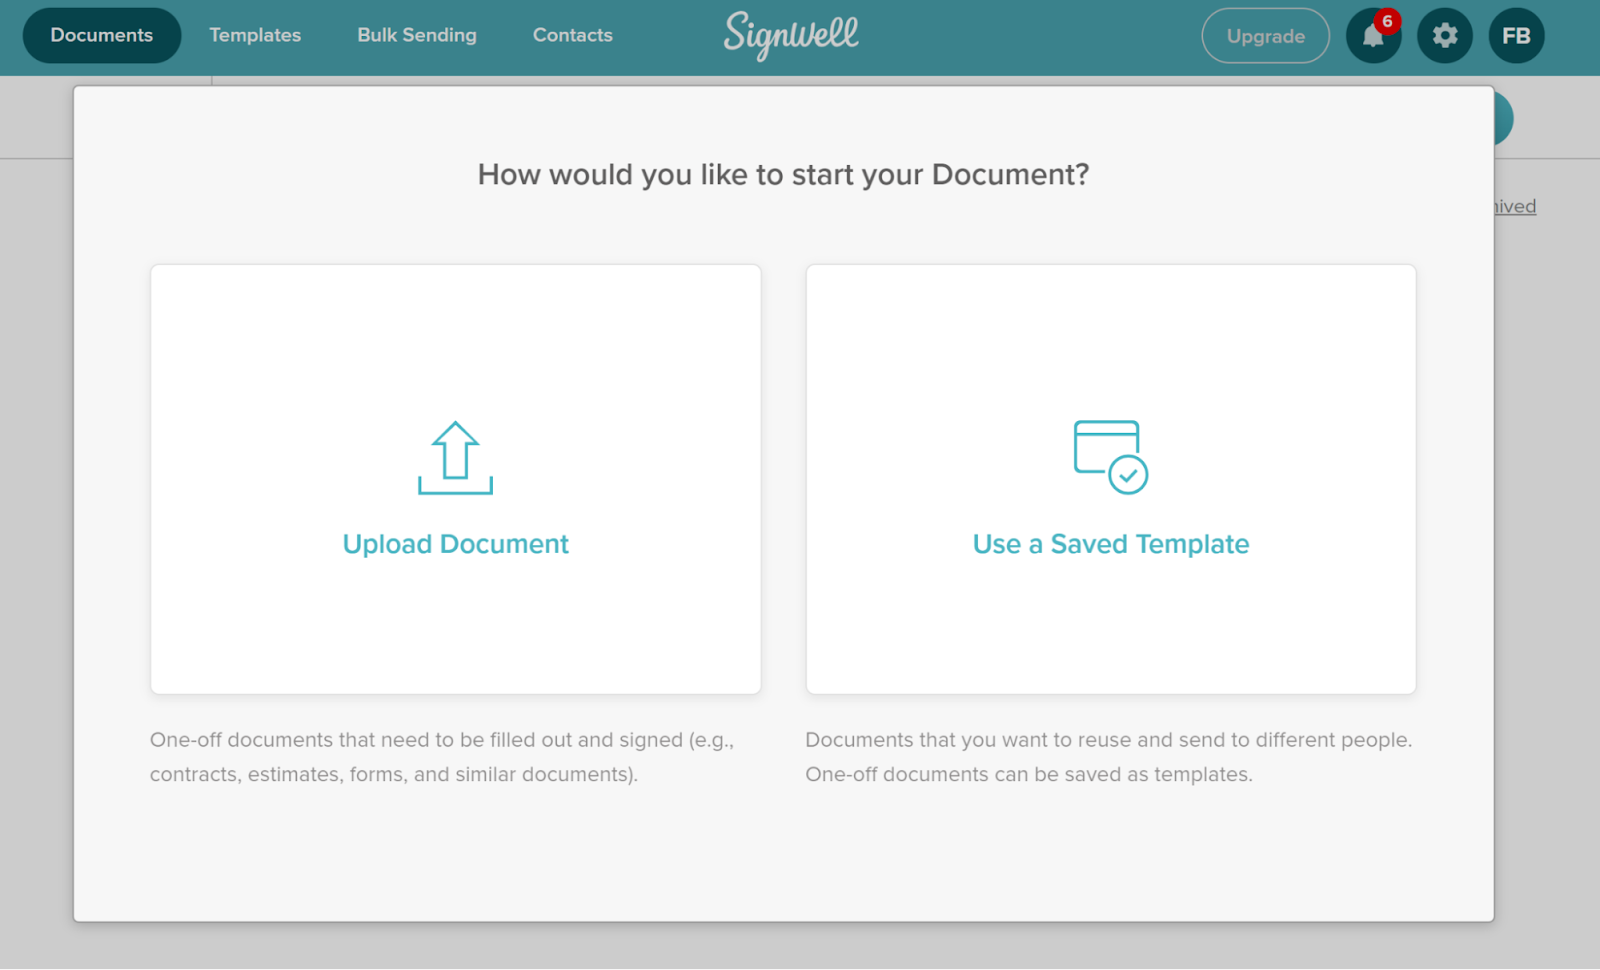
c. Since we’re working with a PDF, click “Upload Document” and select your PDF file from your device.
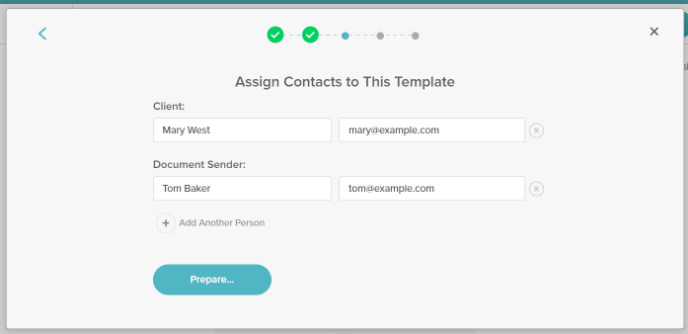
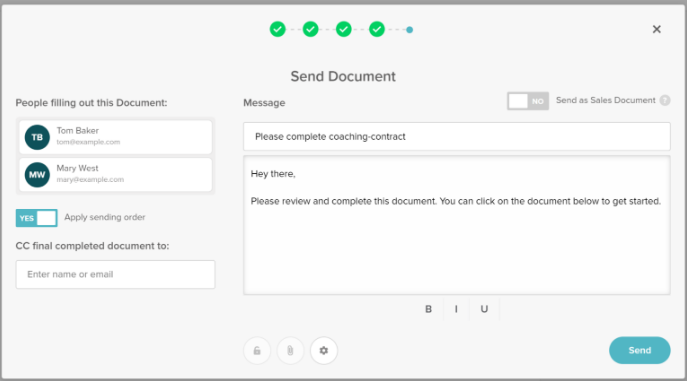
Once your PDF is uploaded, you’ll need to add the contact details of the people who will sign the document:
a. Enter the names and emails of the recipients.
b. If you need to sign the document, add your own information as well.
c. Once done, click “Prepare” to move to the next step.
Now, you’ll be able to place the necessary fields for signing within the PDF:
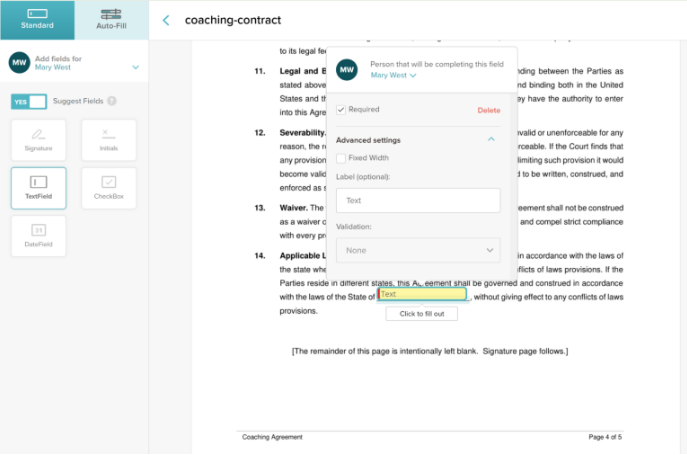
a. On the PDF preview page, you can drag and drop fields such as:
b. Assign the fields to the appropriate recipients by selecting their names from a dropdown menu.
c. If a field is assigned to you, simply click to fill it out.
d. Optional: Set up data validation rules to ensure signers enter information correctly.
Once the document is ready for signing:
a. Click “Send” at the top-right corner of the dashboard.
b. A pop-up window will appear where you can:
c. After reviewing, click “Send”, and the document will be emailed to the recipients for signing.
d. Each recipient will receive a copy of the signed document once the signing process is completed.
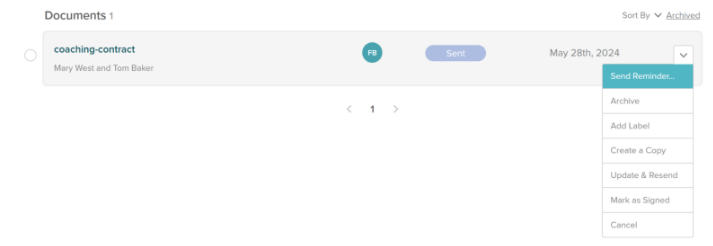
With SignWell, you can track the progress of your documents in real time:
a. Monitor who has viewed and signed the document.
b. Set up notifications to stay informed at each step of the signing process.
c. Use automated reminders to prompt recipients to sign if needed.
Once the document is fully signed:
a. You can download the signed PDF to your computer.
b. Alternatively, save it to the cloud for secure storage and future access.
To do this, click the “Save As” button, located next to the “Send” button at the top-right corner of your document dashboard.
Before you can send PDFs for signatures, you’ll need an Adobe Acrobat account:
a. Visit the Adobe Acrobat Sign website or the main Adobe Acrobat site.
b. Create an account using your email address. If you already have an Adobe account, you can simply log in.
c. Some advanced e-signature features, such as authentication methods and recipient language options, may require a paid subscription.
Once your account is set up, open the PDF you want to send for signature in Adobe Acrobat or Acrobat Reader:
a. Select “All tools” from the toolbar and choose “Request e-signatures.”
b. Alternatively, click on “E-Sign” from the global bar and select “Request e-signatures.”
In the Sign panel that appears:
a. Enter the email addresses of the recipients who will be signing the document.
b. Customize the message if you want to provide specific instructions.
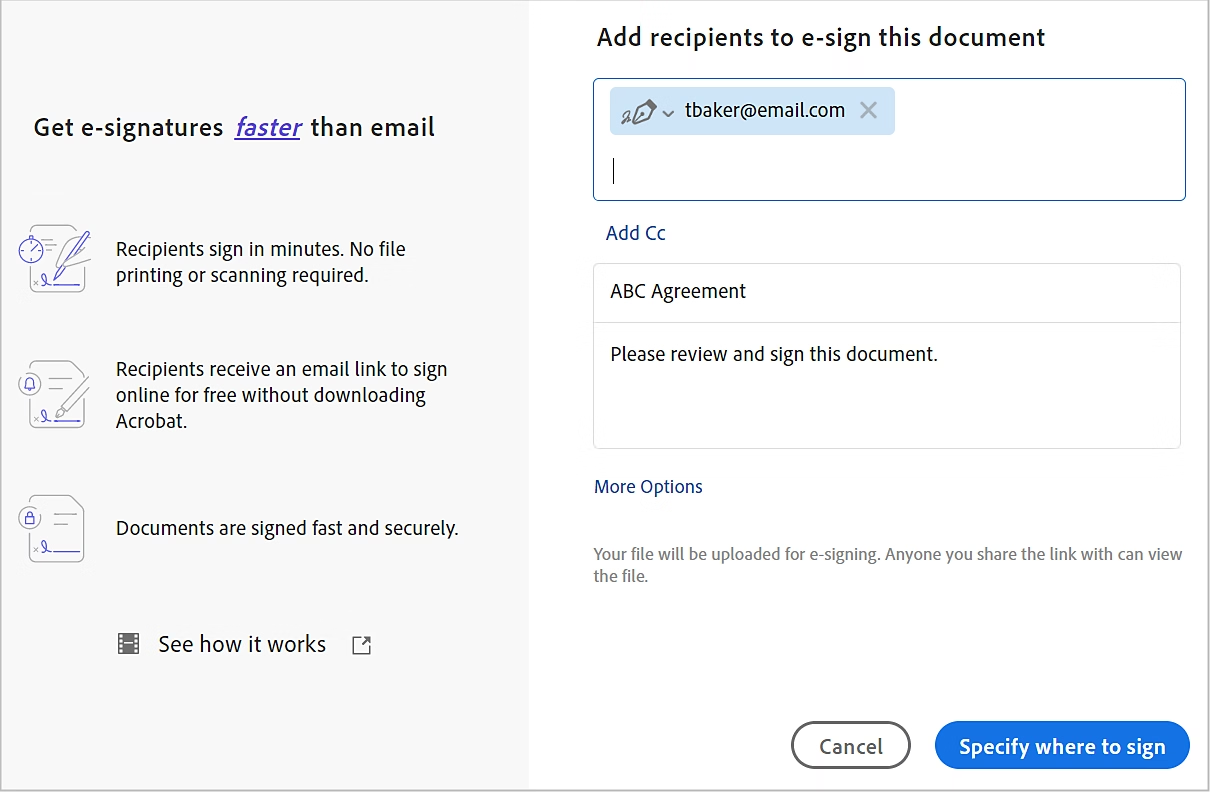
c. Access advanced options by selecting “More Options.” When ready, click “Next.”
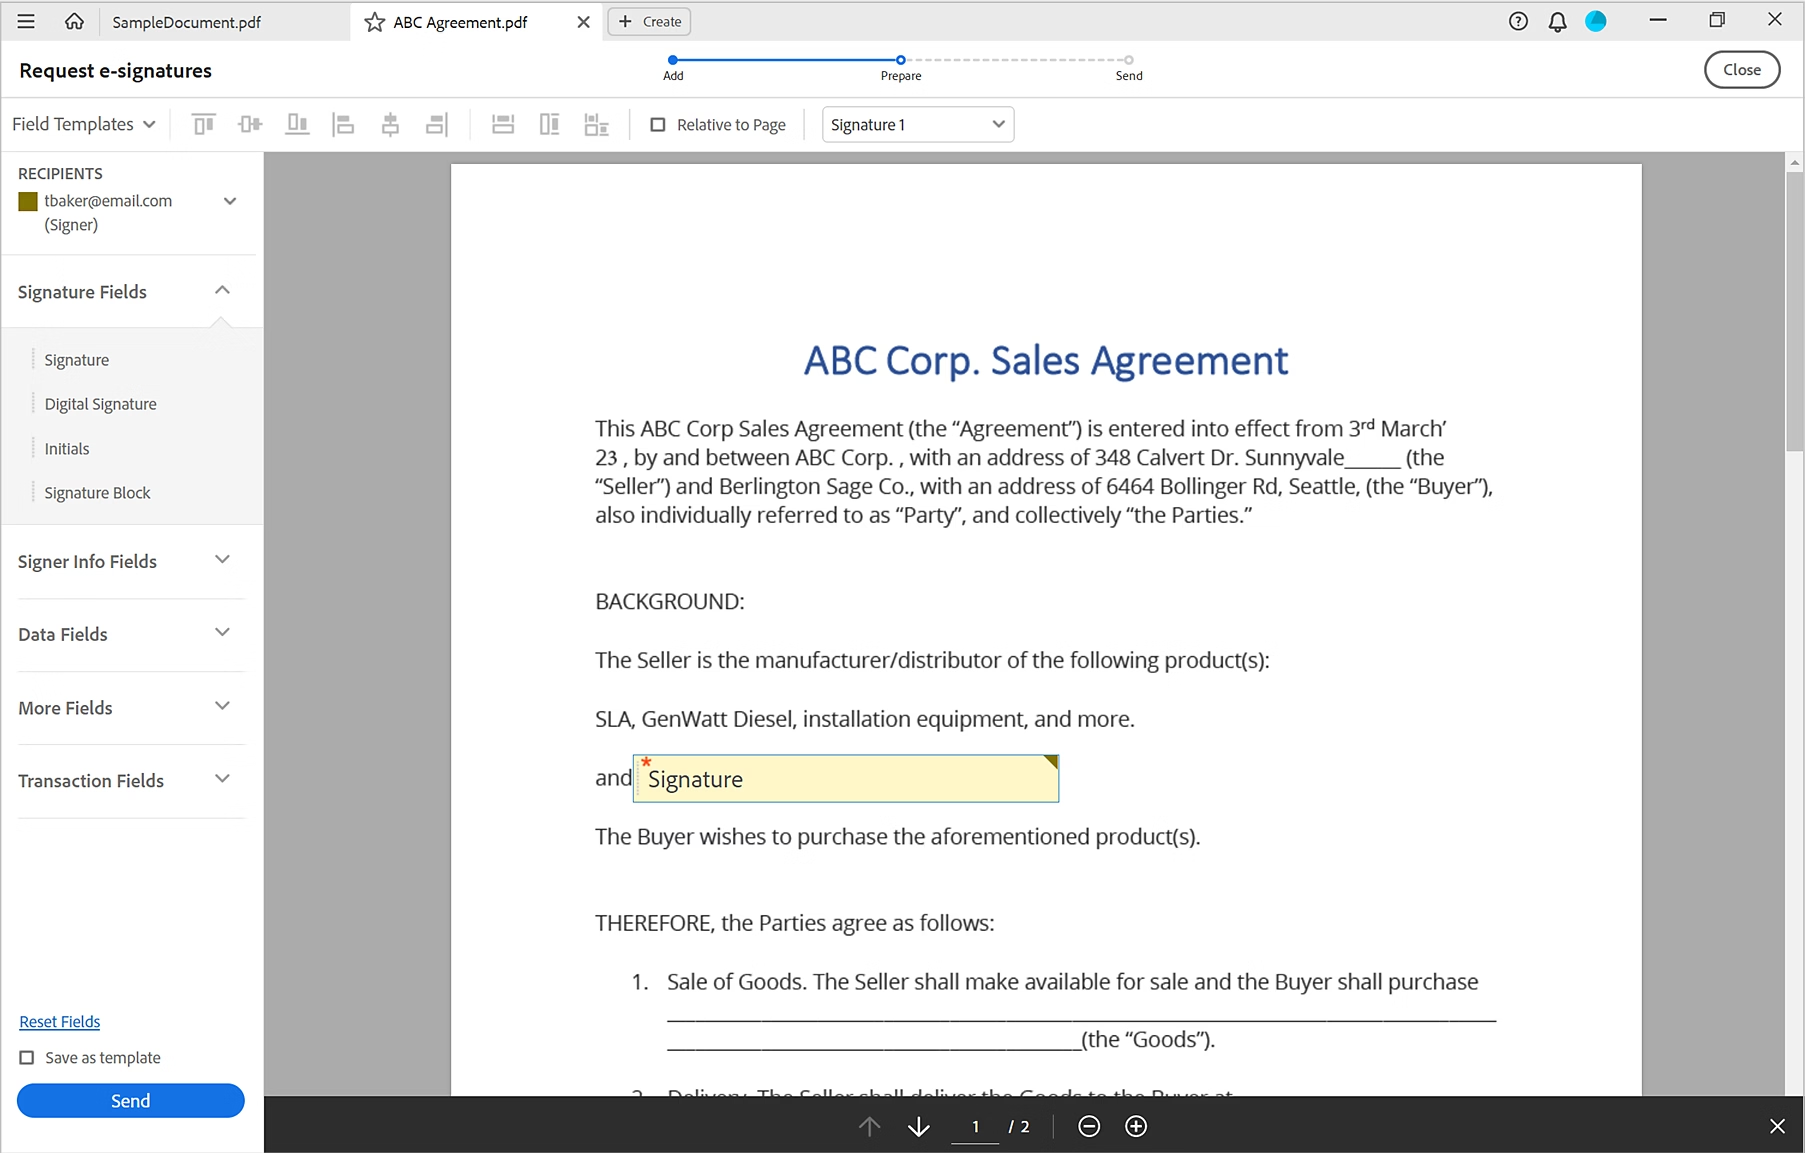
You can now specify where each recipient should sign:
a. Choose “Specify where to sign” and a preview of the document will appear.
b. Use the Recipients drop-down to select a signer, then drag and drop the relevant signature fields (or any other fields) onto the document.
c. Repeat this for all recipients.
After setting up the signature fields and options, click “Send.” The document will be emailed to all recipients, and you’ll receive a confirmation that the agreement has been sent.
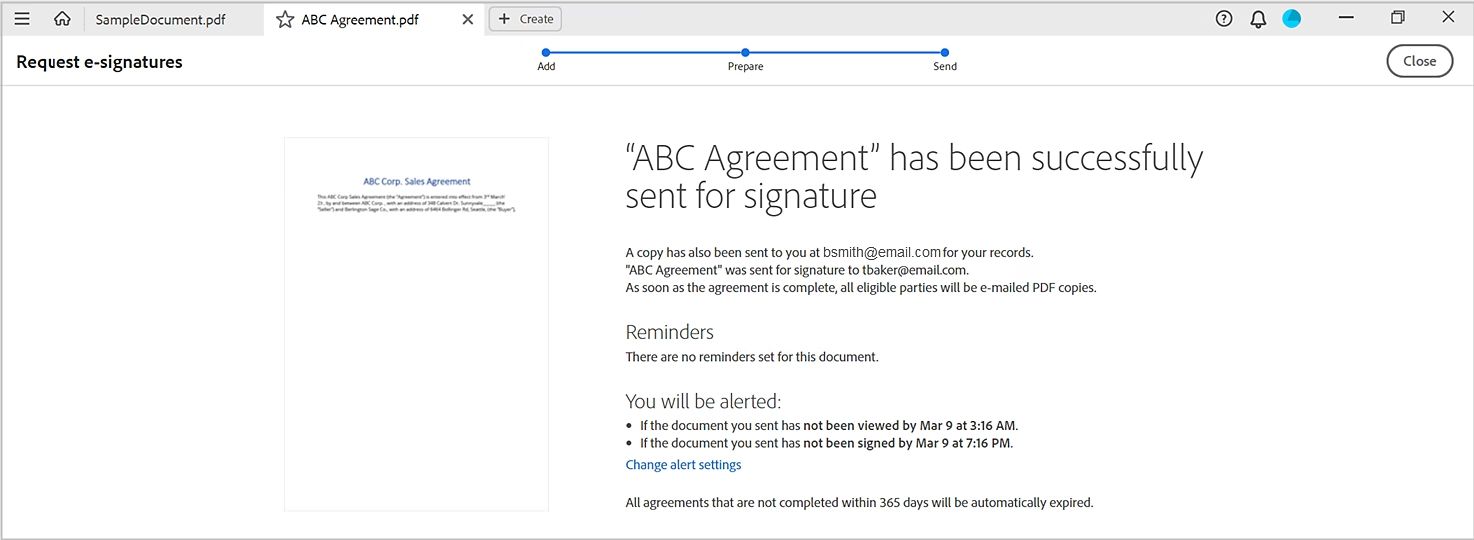
Once the document has been sent, you can track its progress:
a. Go to the Acrobat Home page and under Agreements, select “All Agreements” (for individual or team users) or “Adobe Acrobat Sign” (for enterprise users).
b. Monitor the status of each document:
Signers will receive an email notification with a link to sign the document. They can sign using a web browser, mobile device, or the Acrobat desktop application—without needing to create an Adobe account. After all signatures are completed, both you and the signers will receive the finalized PDF via email.
When sending a PDF for signing, it’s important to verify the signer’s identity to make sure the signature is real and legally valid. Failing to confirm the identity of signers could result in unauthorized or fraudulent signatures, leading to legal and compliance issues.
Here are some effective methods to verify your signer’s identity:
Ensure your eSignature platform connects securely with other tools and systems like cloud storage, document management systems, or customer relationship management (CRM) software. This helps maintain the security of your documents and data throughout the entire signing process.
Secure integrations ensure sensitive documents are transferred safely between platforms, reducing the risk of unauthorized access or data breaches.
When choosing an eSignature platform, look for features that support:
At SignWell, we ensure all integrations meet these standards. Our platform uses advanced encryption, secure APIs, and complies with SOC 2 and GDPR to safeguard your documents.
We also comply with U.S. and international eSignature laws, including eIDAS, PIPEDA, and HIPAA, guaranteeing that your documents are legally valid and secure, regardless of location.
A clear electronic signature policy helps ensure the safety of your documents. It outlines the rules, procedures, and security measures that must be followed within your organization when sending or receiving documents for electronic signature.
Here’s what should be in your eSignature policy:
Your PDF contracts and agreements carry significant weight once sent for signatures. Mishandling them can lead to disputes or legal issues. With SignWell, your documents are securely sent and signed, reducing the risks of errors or unauthorized access.
SignWell offers encryption, audit trails, and an intuitive interface to help you manage signatures, track progress, and receive notifications. Protect your business and streamline the signing process with ease.
Sign up for free today and experience the difference!
Putting a signature on a document shouldn’t be hard. The SignWell mission? Simplify how documents get signed for millions of people and businesses.
Get Started Todaybusinesses served, so far...
total documents signed
customer support satisfaction