How to Add Digital Signatures in a Web Application: A Step-by-Step Guide

Quick Summary

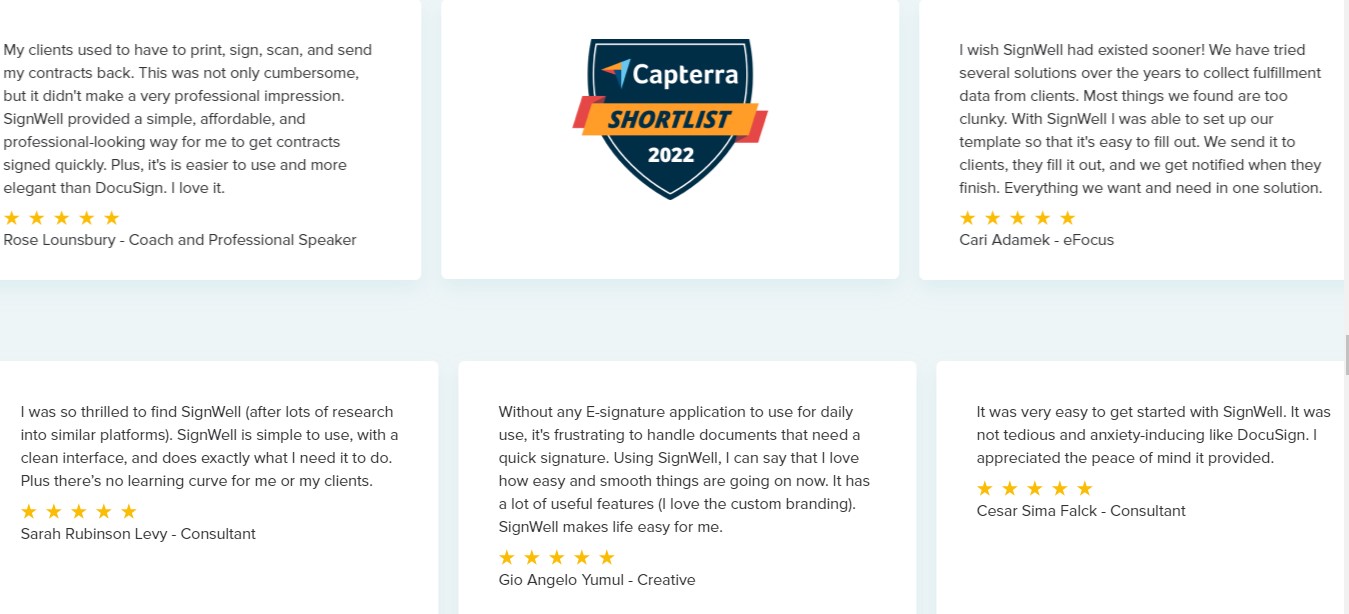
We provide a comprehensive guide on integrating digital signatures into web applications using SignWell’s API, covering both test and live environments. Trusted by over 61,000 businesses, SignWell ensures secure, efficient e-signatures. Adding this functionality streamlines contract management, speeds up approvals, and enhances security. For more tips, visit our resources page.

Want to Know How to Add a Digital Signature to a Web App?

Integrating digital signatures into your web apps and websites can be game-changing for your business. According to a report, companies that adopt e-signature solutions reduce document handling expenses by 85%. This reduction stems from decreased overhead costs related to printing, faxing, and storage of business contracts, agreements, and other essential documents.

However, business owners may be hesitant to add digital signatures to their web app due to concerns about the complexity of implementation and uncertainty regarding compliance with legal standards. This is why SignWell has written this comprehensive guide. 

We’ll take you step-by-step through the process, from setting up your test environment to launching production-ready features using our powerful API. By the end, you’ll have all the knowledge needed to integrate secure, efficient, and legally binding digital signatures into your web application.

Why Listen to Us?

We ensure all documents signed on our platform comply with international e-sign laws, such as the U.S. ESIGN Act, UETA, and the EU’s eIDAS, to guarantee that signatures collected are legally binding in major jurisdictions. 

By leveraging our years of experience, legally compliant signatures, and intuitive platform, we have proven to be a trustworthy solution for digital signatures in web applications. Whether you’re a developer seeking easy integration or a business owner looking for efficiency, SignWell is equipped to handle your needs.

SignWell Digital Signature Solution

How to Add Digital Signatures in Web Applications with Best Practices

Thanks to APIs, adding digital signatures to your web application has never been more secure, scalable, and straightforward. They are the way forward as they enhance adherence to legal requirements and significantly minimize the time spent on development.

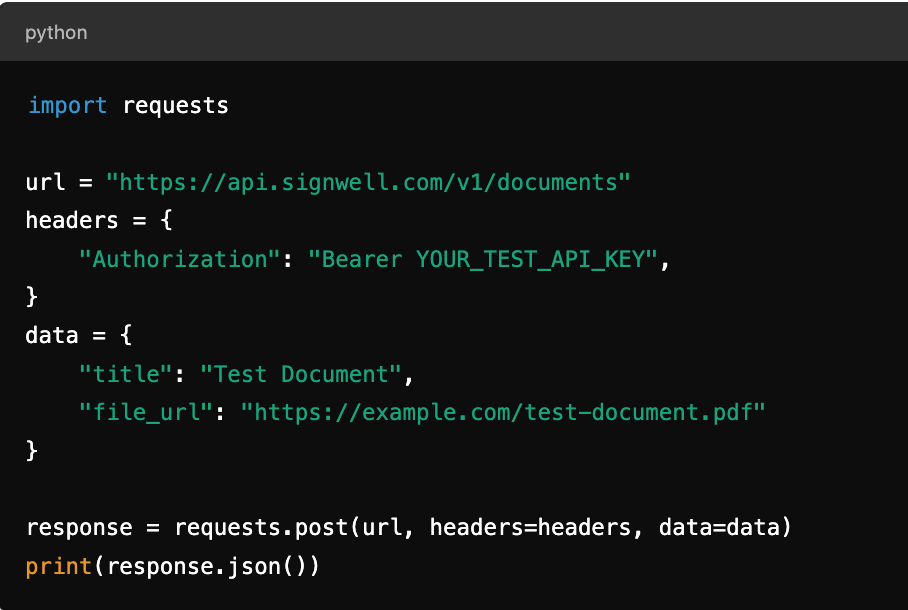
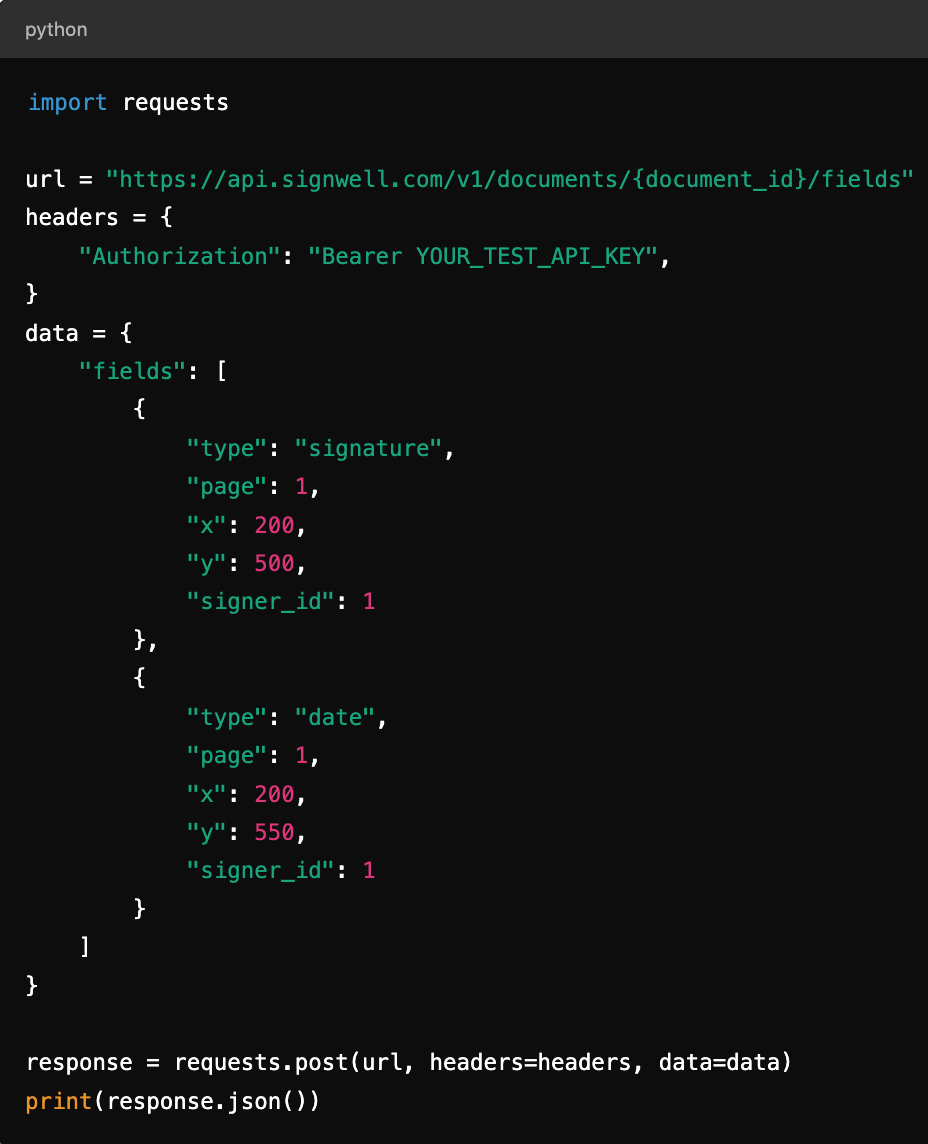
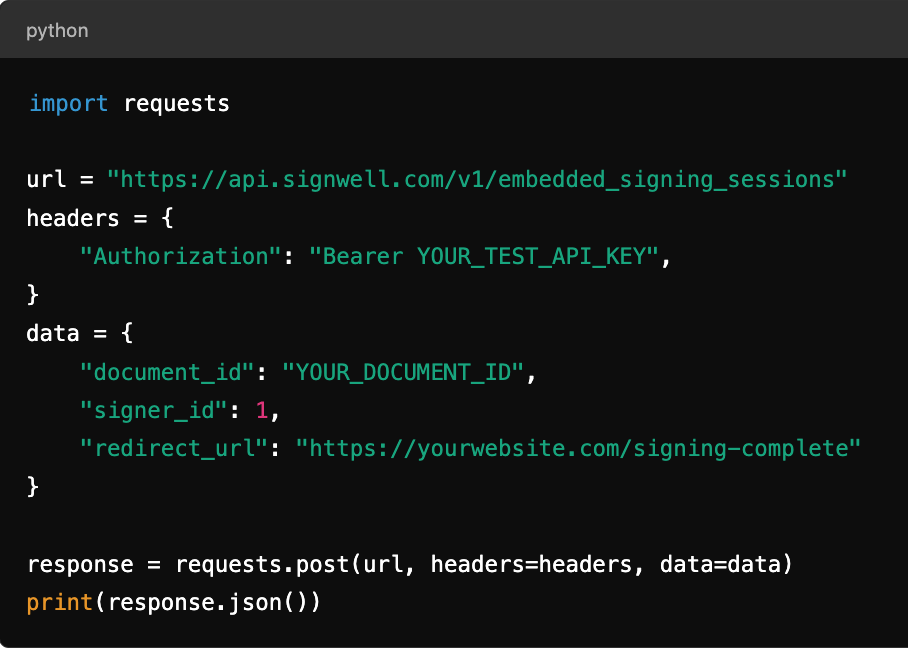
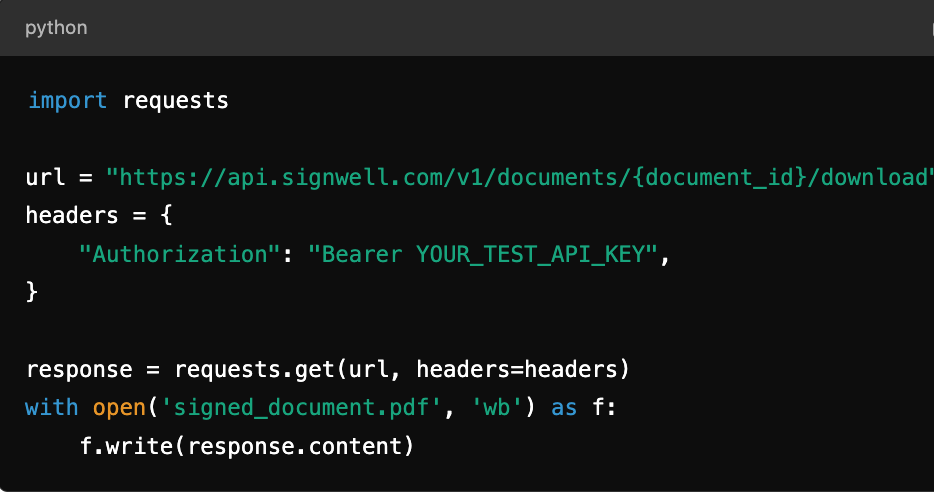
Next, we’ll demonstrate with sample Python code how to set up and test digital signatures in our test environment. You can test all features to ensure they work as expected, there are no vulnerabilities, and the digital signing process is smooth. Then, we’ll go through how easy it is to do the same thing from your web application.

Steps for Embedding Digital Signatures in a Test Environment

1. Set Up API Access

    • Visit the SignWell website and sign up for an account. The free tier is for basic testing. We offer unlimited test usage with the free account, and up to 15 documents per month. 
    • Navigate to Settings > API page in your dashboard and generate an API key to authenticate your requests.
    • Enable test mode. When making API calls, ensure your set test_mode: is true to work in a test environment without affecting production data.

2. Review SignWell’s API Documentation

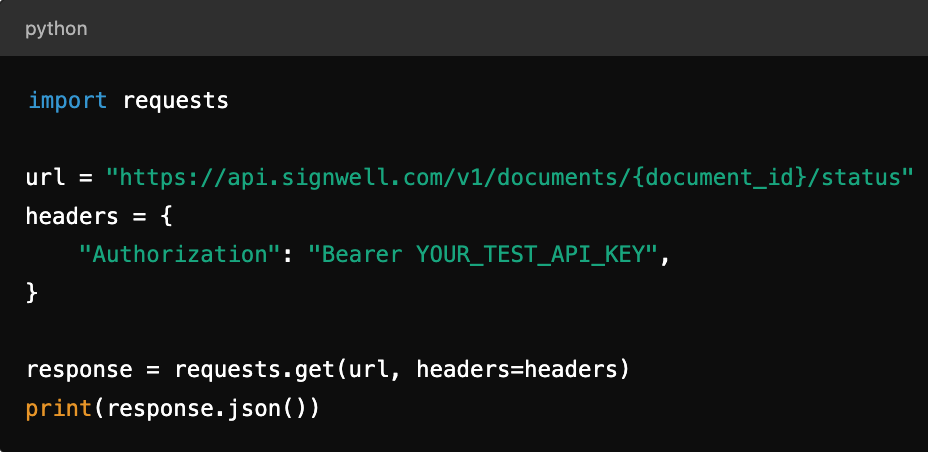
Before making API calls, review our detailed API documentation to familiarize yourself with the available endpoints for creating documents, embedding signature requests, and tracking the status of those requests.

3. Install Necessary Libraries

Choose your preferred programming language and libraries you will use to interact with the API. Our API is a RESTful API and can be used with popular programming languages like Python, Java, Node.js, PHP, and Ruby on Rails.

 Install the relevant libraries for handling HTTP requests, for example:

    • Python: pip install requests
    • For Node.js: npm install axios or fetch
    • For Ruby: gem install rest-client

These libraries allow you to make RESTful API calls to the SignWell API endpoints.

4. Create a Test Document for Signature

    • Click the New Document button and upload any document you want to test with. 
    • Include placeholders for the signature, date, and other fields (e.g., text or checkbox).

Create Test Document for Signature SignWell API

5. Add Fields and Signers to the Document

    • After creating the document, you need to define where signers will place their signatures, enter dates, or add any other necessary information.

Add fields and signers to document SignWell API

6. Generate an Embedded Signing URL

    • To test the embedded signing process, create a session using the API to return an embedded signing URL. You will use this URL to embed the signature process into your web application.
    • The response will include a signing URL that you can use to test users’ interactions with your embedded signature flow.

generate embedded signing URL SignWell API

7. Embed the Signing URL in Your Web Application

    • Use the signing URL provided by the API to embed the signing experience in your web application. For example, you can use an iFrame or redirect the user to the signing page directly.

8. Monitor and Track Test Signatures

    • As part of the testing process, track the document status through the API to ensure the embedded signing process functions correctly. You can use the document tracking API to check the signature’s progress and completion.

monitor and track test signatures SignWell API

    • Once the signature process is completed, the final signed document will be available for download or review via the API. Make sure to download the final document for validation.

download document SignWell API

Steps for Embedding Digital Signatures in a Live Environment

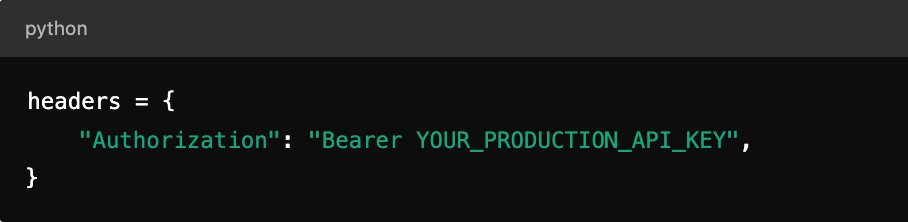
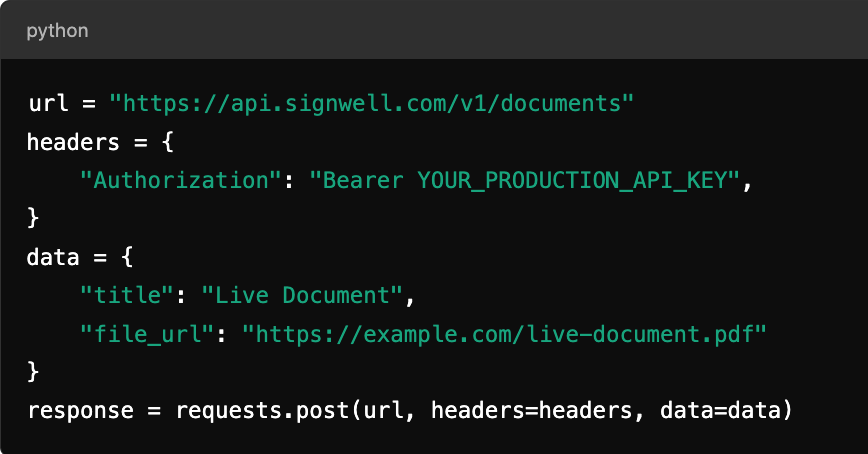
The setup process for embedding digital signatures in a live web application using SignWell is similar to the steps for a test environment, with a few key considerations for your live environment.

1. Change from Test Mode to Production Mode

    • Ensure you use the production API keys, which are located in the dashboard. This allows your live application to interact with real documents and signers.
    • If necessary, update your API endpoint URLs to use production endpoints.

2. Set up Authentication Using Production API Keys

    • Use your production API key in the headers for all API calls to ensure they work live.

production API keys SignWell API

3. Create and Configure Documents 

    • Similar to test mode, ensure the documents contain all required fields and use the API to upload documents, add fields, and configure signers.

create and configure documents SignWell API

4. Generate Embedded Signing URL for Live Users

    • Create an embedded signing session for live users. The URL will allow users to sign documents directly within your web app.
    • After signing, ensure that the redirect URL leads to a live success page in your app.

embedded signing url for live users SignWell API

5. Embed the Signing URL Into Your Application

    • Use the embedded signing URL to integrate the signing process into your live web app. You can embed this within an iframe or redirect users to the URL.

6. Test for Production Failures and Edge Cases

    • Before going live, thoroughly test the production environment using real documents, live signers, and actual integrations to ensure all flows work correctly under live conditions.
    • Account for edge cases such as failed signatures, network issues, and browser compatibility.

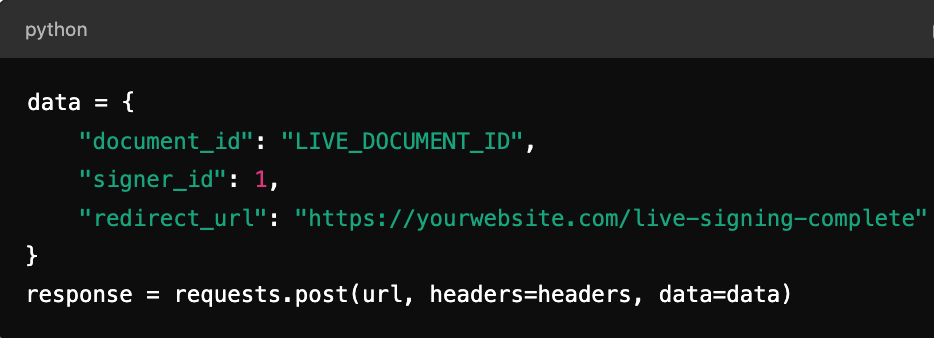
Consider implementing webhooks to receive real-time updates on document statuses. Ensure your server is properly configured to handle these events securely.

Best Practices for Using SignWell’s Digital Signature API

To maximize the benefits of SignWell’s digital signature API, follow these best practices:

  1. Ensure Secure API Integration: Make sure your API integration follows security best practices, such as using HTTPS and properly managing API keys.
  2. Test in a Safe Environment: Before going live, thoroughly test your integration in a sandbox environment to avoid any disruptions in production.
  3. Automate Document Handling: Take full advantage of SignWell’s automation capabilities to streamline document workflows and reduce manual handling.
  4. Monitor Activity: Regularly monitor your API usage and webhook events to ensure everything is running smoothly and securely.
  5. Stay Compliant: Keep up with evolving legal and regulatory standards related to e-signatures to maintain compliance across all regions where you operate.

Conclusion

Integrating digital signatures into your web application with SignWell’s API not only simplifies the document signing process but also enhances security, compliance, and scalability. Whether you’re a small business or a large enterprise, SignWell provides an easy-to-use, secure, and affordable solution to modernize your operations and improve workflow efficiency.

Ready to get started with digital signatures? Sign up for SignWell today and streamline your business processes.